In November, 2022, I took my first post-COVID airplane trip. I was very excited to travel to the amazing town of Newport, R.I., located on the Atlantic coast where Long Island Sound meets the ocean. Newport was founded in the 1600s and has been America’s biggest sailing town for more than 300 years. In addition it was also the vacation home for New York’s richest families, such as the Vanderbilts. These families built over 100 amazing mansions in Newport. It’s a fun place to visit.
My reason for travelling to Newport was that Zentangle held a wonderful, 4-day event there with daily classes and teachings. My husband, who is very interested in sailing and boats, went with me, visiting New Bedford, Mystic, Plymouth and other nearby boat meccas.
At the event, Rick and Maria, Zentangle founders, introduced a new concept that they called Zentomology. This isa new way of organizing the thousands of tangle patterns that have been designed over the years. Ten years ago, when Zentangle was founded, there were 200 patterns. But the invitation was open to anyone to design a pattern. Hundreds of tangle patterns have been designed, one even by me! It’s called Nanalee and is based on banana leaves. What seems like thousands of tangle patterns have been collected and indexed for search online for by the amazing Linda Farmer at www.tanglepatterns.com.
At the conference, we talked about common characteristics of tangles, and we sorted hundreds of patterns into different groups, for example: grid tangles, organic tangles, drama tangles. Rick and Maria named this system “Zentomology.” I believe Rick said, “As insects are to entomology, so tangle patters are to Zentomology.”
The book on Zentomology is here.
This was a wonderful system to add to my understanding. Before Zentomology, I had thousands of tangle patterns floating around my head, without any organizational system. Once I understood the categories, things began to fall into place.
For the last few days I have been enjoying Zentangle Project Pack 20. Each Project Pack is a series of video classes that are free to watch. For $35 or so, you can also receive a package of supplies that includes everything you need to complete all the videos: pens, pencils, gel pens, blank Zentangle papers. (Zentanglers call the papers “tiles” because we combine everyone’s together into “mosaics.” We have our own language to some degree, mostly becuase it’s fun. )
Project Pack 20 is devoted to a single category, Blossoming Tangles. These tangles tend to radiate from a center point and plant themselves like a blossom. They are often bold and like to take center stage in a composition.
Project Pack 20’s first video was posted online on March 19, with a new video appearing every other day and continuing through March 31, so about 9 videos. You don’t have to buy anything to watch the videos. Instead of paying to receive all the supplies in the mail, you can just use whatever pens and papers you have on hand. I can’t recommend the project packs highly enough. I have so much fun doing them.
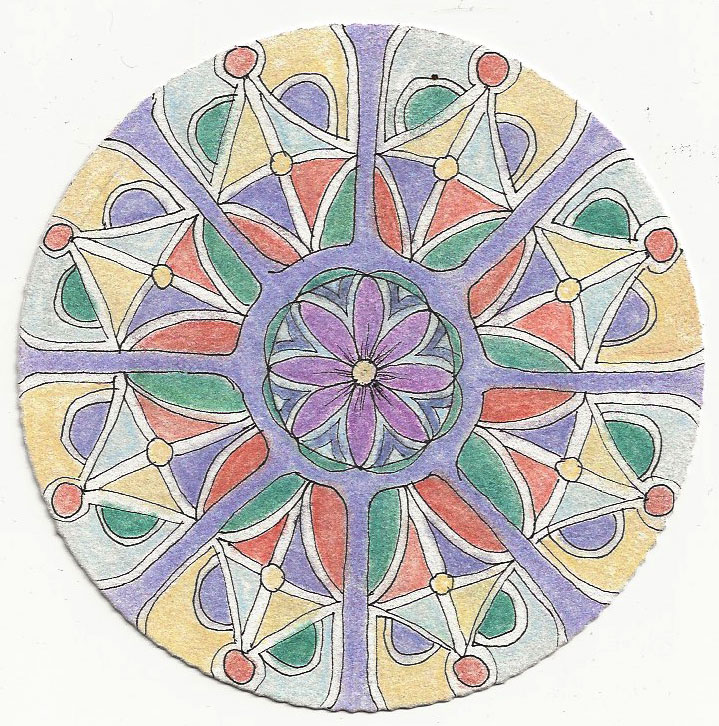
Here are the five Zendala (Mandala shaped) tiles that I have done so far. The first three are on gray tiles, and numbers four and five are on tan tiles, which we call “Renaissance” tiles, to honor the tan papers that were used for drawing by Leonardo and others from the Italian Renaissance in about 1500.
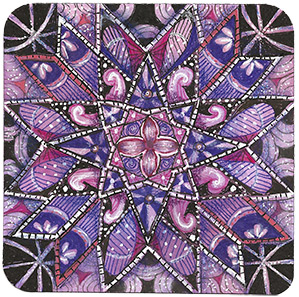
Day 1 – The first day’s video was led by Rick and Maria, Zentangle founders, with Rick doing the drawing. This tile uses a tangle called Hollis designed by Rick and Maria from a pattern they saw on a plate when they were in Taiwan. Here are the Hollis step outs.

I love the single red bead. Each of the project videos so far has a small red object that is a focus of attention. in addition, I used the red pen to add my signature symbol. Zentanglers call that signature symbol a “chop.” This is after the chop used by the Japanese artists of the Ukiyo-e (The Floating World) that inspired the impressionist movement when European artists first saw the Ukiyo-e artists’ woodblocks in the mid 1800s. This group of japanese artists includes Hokusai and Hiroshige. They often used red for their chop.
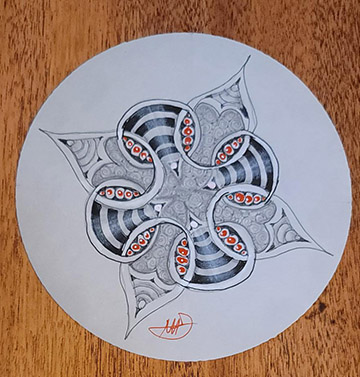
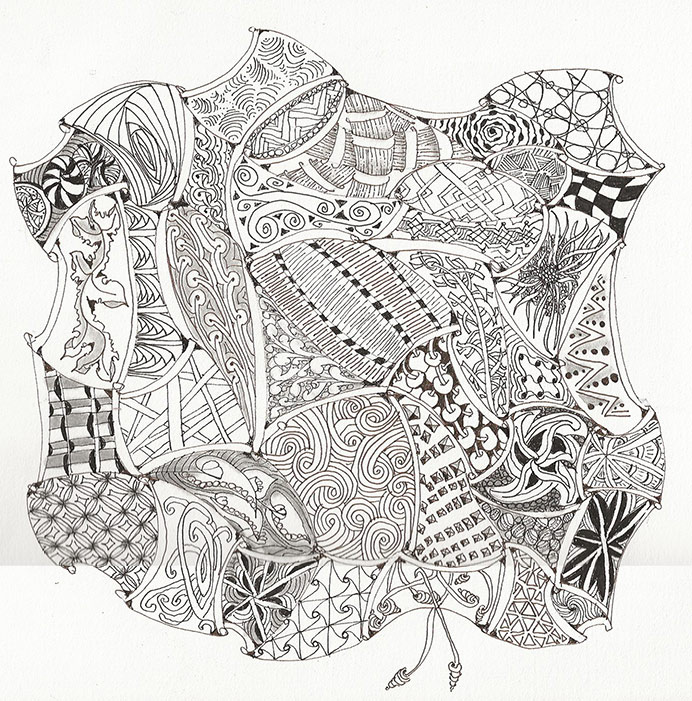
Day 2 – This day’s video lesson was led by Molly Hollibaugh, daughter of Rick and Maria. Molly used a new tangle patterrn called WayBop. See Waybop step outs here.
She also used the tangle pattern Striping to make the striped areas. The background pattern in the middle is printemps.
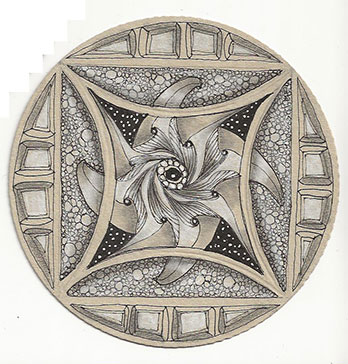
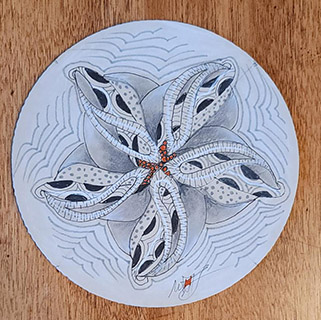
Day 3 – This video lesson was guided by Martha Huggins. Martha is the daughter of Zentangle founders, Rick and Maria. This tile uses another very new tangle pattern, Wyfore. Martha reminded us that the tangle was named in honor of her son, Wyatt. Rick and Maria have named many tangles after their grandchildren.
Day 4 – Guided by Rick and Maria, this video lesson is drawn by Maria. It’s a pleasure to watch her draw, because she is so very skilled. The primary tangle used is called Ellish, because it looks like the letter “L” in it’s original and simplest form.
Maria also used tangle patterns DooDah and Crescent Moon to decorate the leaf-like shapes.

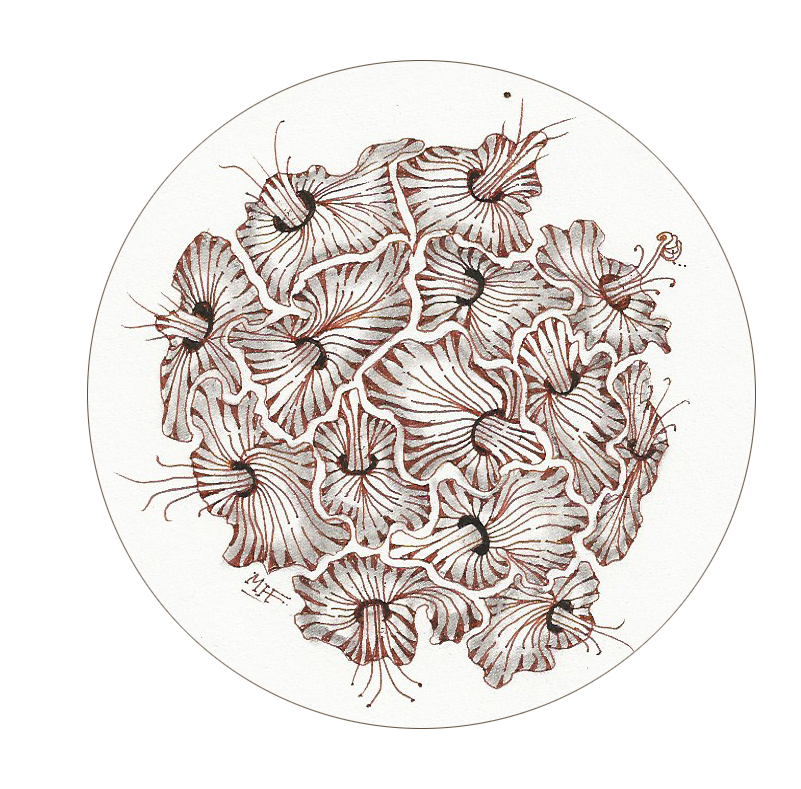
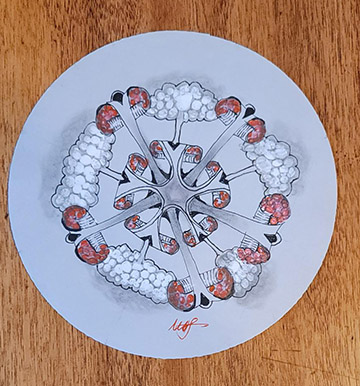
Day 5 – This video was led by Julie Willand. It’s my hands-down favorite so far, I love the use of tangle pattern Arukas to organize the overall composition. Arukas includes the circle in the middle as well as the striped rays that go out to the edges of the tile. “Arukas” is “Sakura” backwards. The Japanese pen company Sakura is a kind of Zentangle partner. They make the recommended pens that we primarily use in Zentangle drawing. Sakura makes excellent quality Micron fine liners in all colors and sizes.
Sakura also invented the Gel pen, and just about every pen you can buy today is a Gel pen. Before the Gel pen we all used ball point pens, invented by the Hungarian-Argentinian Biro. (Ball point pens are called “Biros” in many countries.) Sakura put years of research into the gel pen, wanting to create a water-based pen that was versatile. The ink is free-flowing and quick-drying, and the pens are inexpensive to make. And on top of all that, “Sakura” means cherry blossom in Japanese. What more could you ask for?
Back to the Zentangle. Julie draws many pokeroot zentangles coming out of the Arukas center circle. Poke root grows in my neighborhood, and I have to get some into my garden. The tangle pattern pokeroot looks like a little berry on a stem, or a lollipop. It’s a nice contrast to the straight vertical lines of Arukas. Julie draws a few hundred little orbs to fill in the background, and she patiently colors them all white. I love this whole design!